How to Use your Windows 10 PC as a Portable Monitor
Do you have a Windows 10 tablet or laptop? With the Windows 10 latest update allows you to turn your Windows 10 PC into a portable monitor with touch, pen, mouse, and keyboard support.
Having multiple screen real estate is important for productivity. It allows you to work on multiple documents, spreadsheets, and other tasks at the same time. Suppose you have a spare Windows 10 tablet or laptop. In that case, you can use that as an additional display by using a feature named “Projecting to this PC” introduced in Windows 10 Anniversary Update.
In this article, we will walk you through how to set up your Windows 10 tablet or laptop as a wireless display receiver.
1. Preparing your Windows 10 Tablet or Laptop
There are some requirements that both PCs, the main PC, and the wireless display receiver PC need to have in common.
- Both PCs must run Windows 10 with Anniversary Update or more recent.
- Both PCs must be connected to the same network (Local Area Network).
- For better performance, both PCs must support Miracast Protocol.
2. Configuring your Windows 10 Tablet or Laptop as a Wireless Display Receiver
To configure your Windows 10 tablet or laptop as a wireless display receiver do the following.
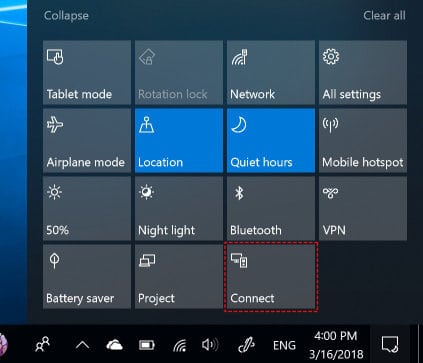
- Click on the Action Center icon.

- Click on Connect button.

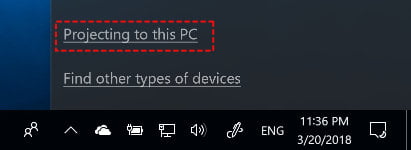
- Click on Projecting to this PC button.

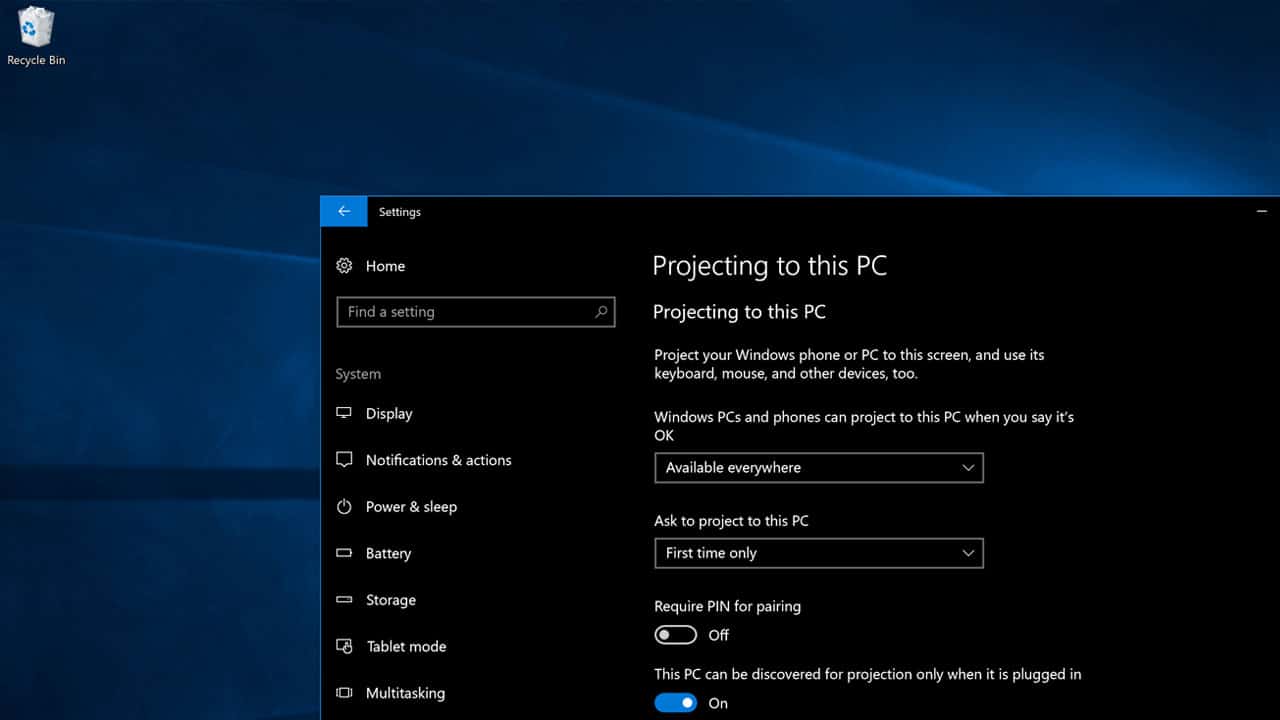
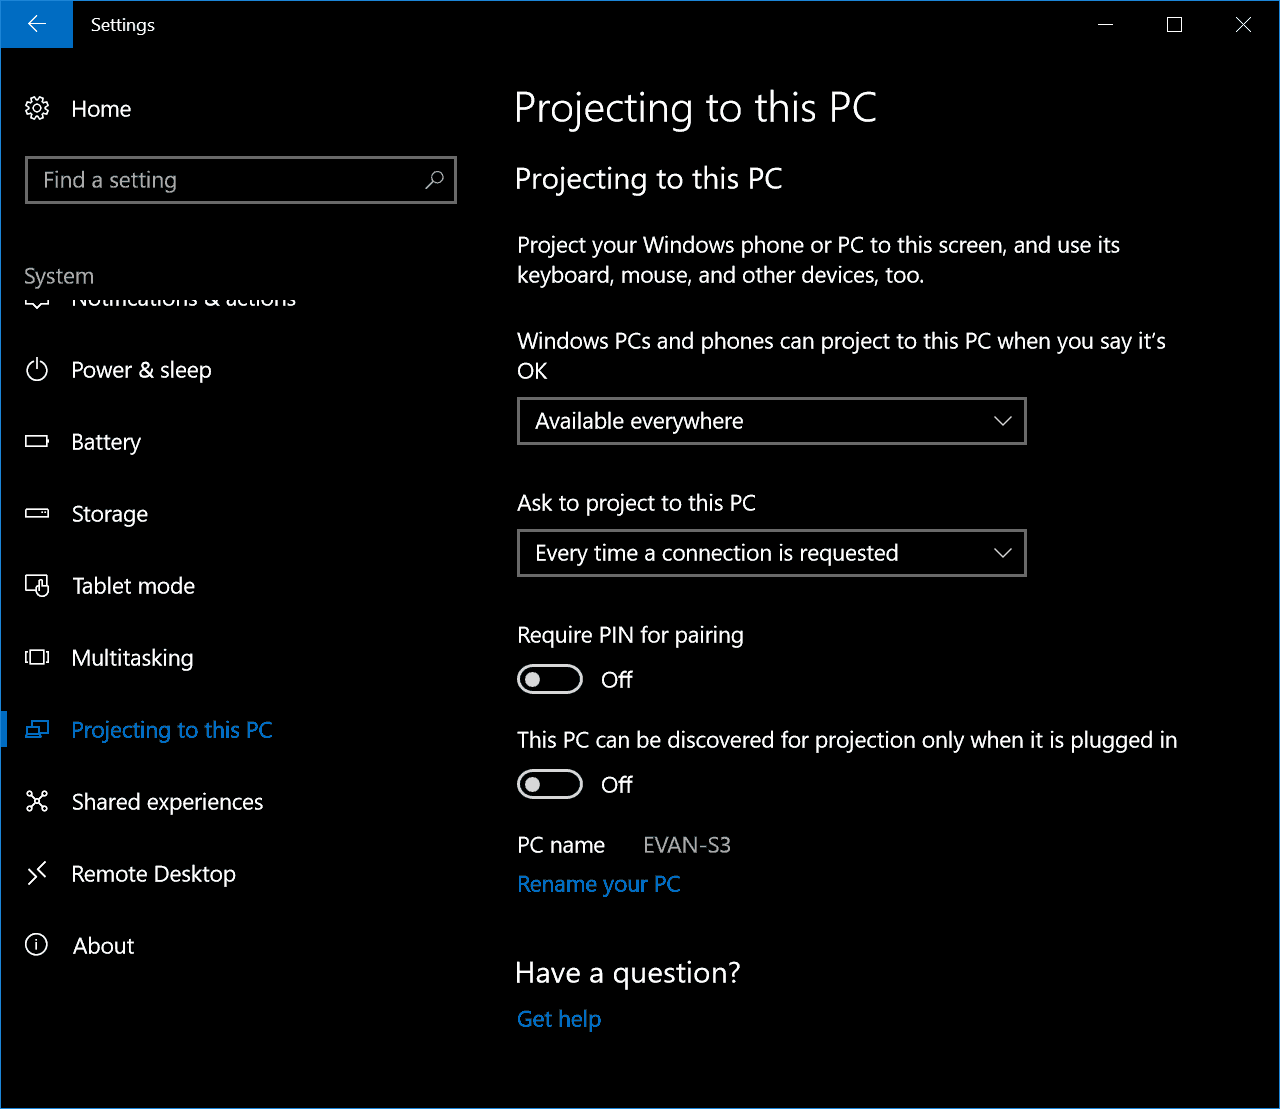
- It will show up the Projecting to this PC settings page as follows.

- Make sure you selected Available everywhere or Available everywhere on secure networks from the first box.

- Select First time only, if you want to confirm when a connection is being made for the first time.

- If you want to use a PIN for confirmation, you can turn on the Required PIN for pairing.
- By default, your computer can only be discovered when connected to a power source. If you want it to be discovered anytime, you need to turn off the “This PC can be discovered for projection only when it is plugged in”.


Now everything is all set and done. Your computer is ready for accepting a wireless display connection.
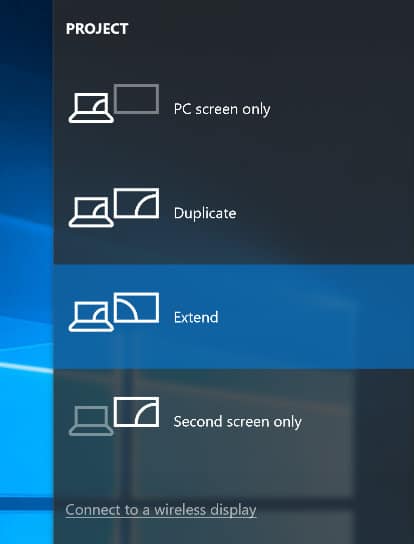
3. Projecting your Main PC to a Configured Windows 10 Wireless Display
Now you can project your main PC to your configured Windows 10 tablet or laptop by:
- Click on the Action Center icon.
- Click on Connect button.
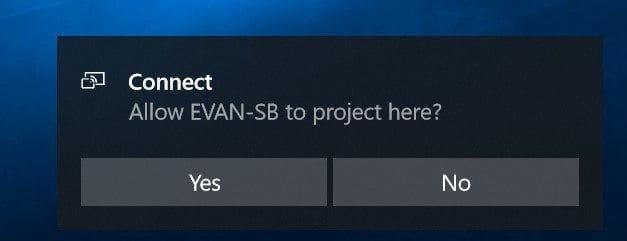
- It will take some time to look for your computer, once it is found, click on the computer name.

- You will need to confirm the connection for the first time. Do this on your Windows 10 tablet or laptop.

- Once you confirm the projection, it will project your main PC screen to your tablet or laptop just like expected on a common monitor.

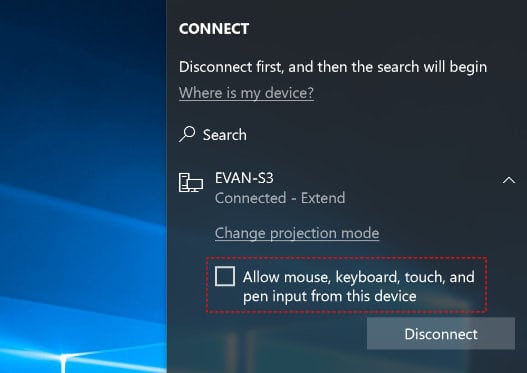
4. Enable Remote Mouse, Keyboard, Touch, and Pen Input
The Projecting to this PC feature also allows you to use your tablet’s input to interact with your main PC session. That includes mouse, keyboard, touch, and pen input. To do so:
- Open Action Center.
- Open Connect.
- Click on the existing projection, and check on Allow mouse, keyboard, touch, and pen input from this device.


Discover More
-

How to Customize Windows 11 Start Layout
-
How to Enable Hyper-V on Your Windows 10 PC
-
How to Enable Windows 11 Touch Keyboard
-
How to Enable and Use the Clipboard History on Windows 10
-
How to Install Brave Browser on Windows 10
-
How to Manage Startup Apps on Windows 10
-
How to Remove Tools Pane Sidebar from Adobe Acrobat Reader DC
-
How to connect or pair a Microsoft Designer Bluetooth Mouse

COMMENTS
Let us know what you think!
We appreciate hearing your thoughts, questions, and ideas about “How to Use your Windows 10 PC as a Portable Monitor”.