How to Configure Remote Desktop on Windows 11
This guide will show you how to enable the Remote Desktop feature on a supported Windows 11 PC and how to remote access the PC.
The Remote Desktop is a feature that enables you to remotely access your Windows 11 desktop from another computer on your network. It’s an exclusive Windows 11 Pro and Enterprise edition feature that isn’t available on the Home edition.
To enable Remote Desktop on Windows 11, go to Settings > System > Remote Desktop. From there, turn on the Remote Desktop feature switch. For more detailed directions, check the following step-by-step guides.
Table of contents
- Remote Desktop Requirements
- Configuring Remote PCs to Accept Remote Desktop Connection
- Establishing a Remote Desktop Connection
1. Remote Desktop Requirements
To use the Remote Desktop feature, you need the following:
1.1. Remote PC
- Windows 11 Pro or Enterprise edition – A PC you want to gain access to is having a Pro or Enterprise edition of Windows 11. The Remote Desktop feature is not available on Windows 11 Home.
- Accepting Remote Desktop – You must configure the PC to have the Remote Desktop feature turned on.
- Proper user accounts and permissions – you must either be a member of the Administrators or Remote Users group.
- Connected to a LAN or Internet.
1.2. Local PC
- Remote Desktop Connections Programs – Your PC must have a Remote Desktop Connection program or any compatible programs with RDP protocol support.
- Connected to a LAN or Internet.
2. Configuring Remote PCs to Accept Remote Desktop Connection
To configure a PC to accept the Remote Desktop connection, use these steps:
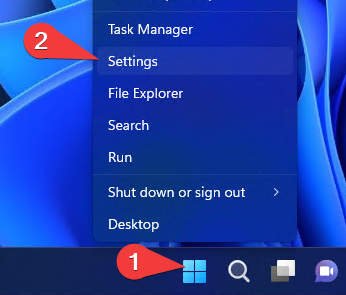
- Right-click Start, and then click Settings.

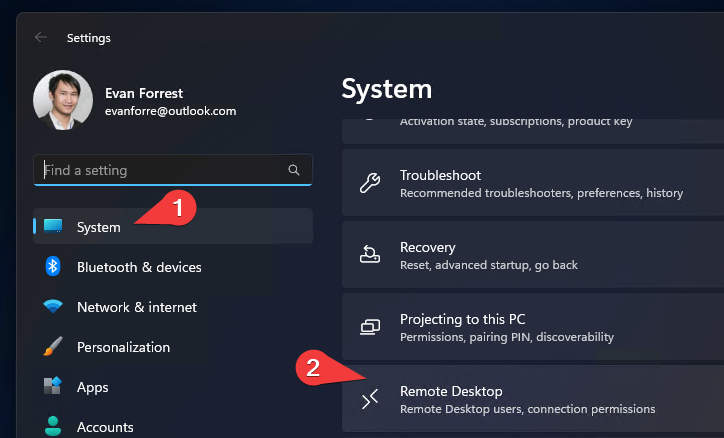
- On the System page, select Remote Desktop.

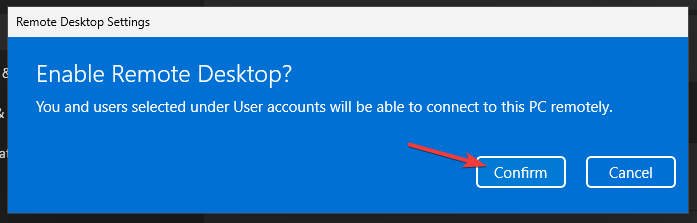
- On the Remote Desktop page, click the toggle to enable the Remote Desktop.

- Click Confirm.

- The Remote Desktop is now enabled.

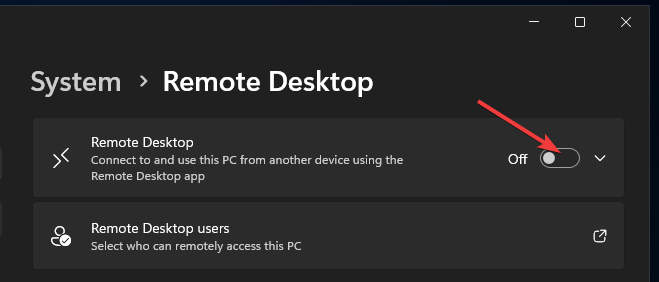
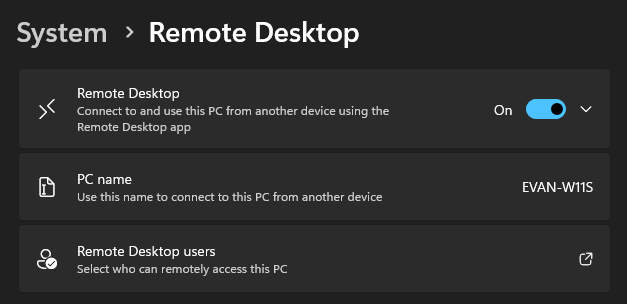
Remember the PC name since you’ll need it when establishing a remote desktop connection.
3. Establishing a Remote Desktop Connection
To establish a remote desktop connection to a remote PC, do the following:
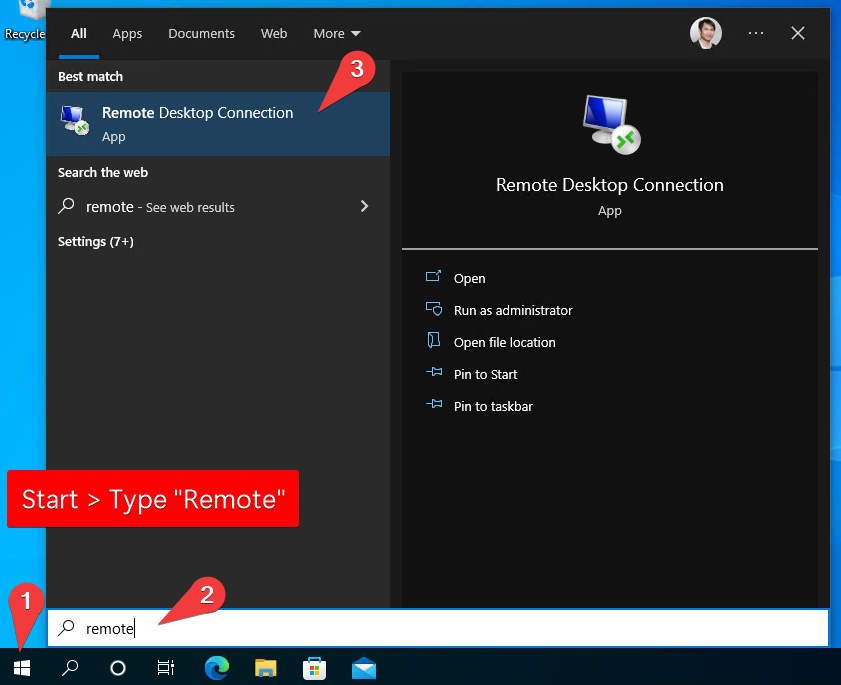
- Click Start, and type the “Remote” phrase to search for the Remote Desktop Connection app.
- Under the Best match section, click Remote Desktop Connection to open the app.

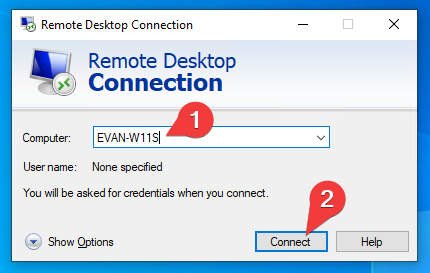
- Type a remote PC name, IP address, or DNS name into the Computer box, and then click Connet.

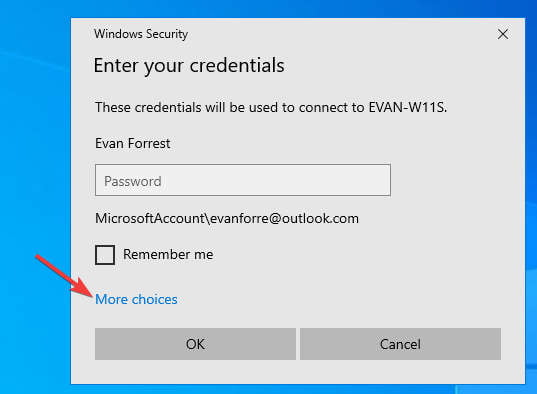
- Click More choices when you want to enter a different account from the current one.

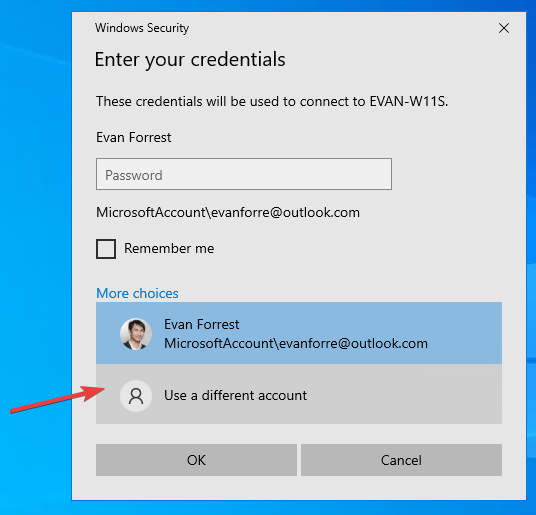
- Click Use a different account.

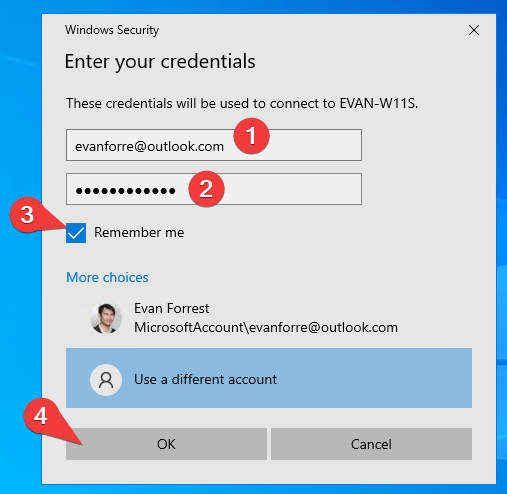
- Enter the remote username and password.
- Check the “Rember me” box if you want it to save your credentials for later use and then click OK.

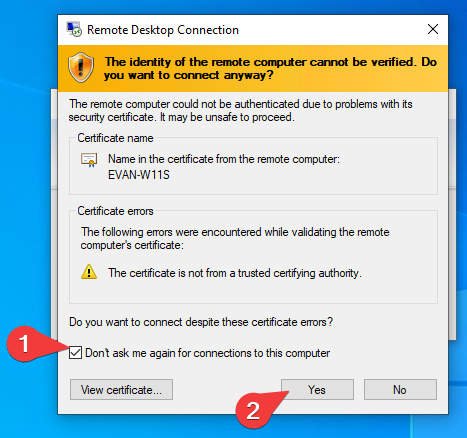
- Check

- The remote desktop connection will start. When connected, you will see your remote PC’s desktop.

Hopefully, this guide helped you to establish a remote desktop connection between computers on your network. If you have any questions or problems with the steps detailed in this tutorial, please let me know in the comment below.
Discover More
-

How to Configure Proxy Settings on Windows 10
-
How to Enable Windows 11 Virtual Touchpad
-
How to Install Mozilla Firefox on Windows 10
-
How to Install Windows 11 on VMware Workstation with Fixes
-
How to Show or Hide Chat Icon on Windows 11 Taskbar
-
How to Show or Hide Suggested Apps in Windows 10 Start Menu
-
How to enable Cortana keyboard shortcut (Win + C) on Windows 10
-
How to enable device encryption on Windows 10


COMMENTS
Let us know what you think!
We appreciate hearing your thoughts, questions, and ideas about “How to Configure Remote Desktop on Windows 11”.