How to Enable Hyper-V on Your Windows 10 PC
In this tutorial, you will basically know about the Virtualization and how to enable Hyper-V features on your Windows 10 PC.
If you are a Pro user, you might already know about having multiple Virtual Machines (VMs) running on a single computer. It is called “Virtualization”. VMWare Workstation and Virtual Box are tools that are mostly used for Virtualization on a desktop PC. However, if you are running on Windows 8.1 or Windows 10 Pro, you can use Hyper-V instead.
What is Virtualization?
Generally, virtualization allows you to run any operating system under a configured environment that is able to simulate the hardware of a full PC. Starting from Windows 8.1, Microsoft has included the Hyper-V feature for Pro and Enterprise editions. Same here on Windows 10, if you are running on Windows 10 64-bit versions of Windows 10 Pro or Enterprise, you can try it out.
Hyper-V allows you to create multiple Virtual Machines (VMs) depending on the memory capacity available on your PC. There are some situations that you might need help from VM such as:
- You want to run older legacy software that works only on Windows XP.
- You want to test newer Insider builds without messing with your Windows 10 production.
How to Enable Hyper-V on Your PC?
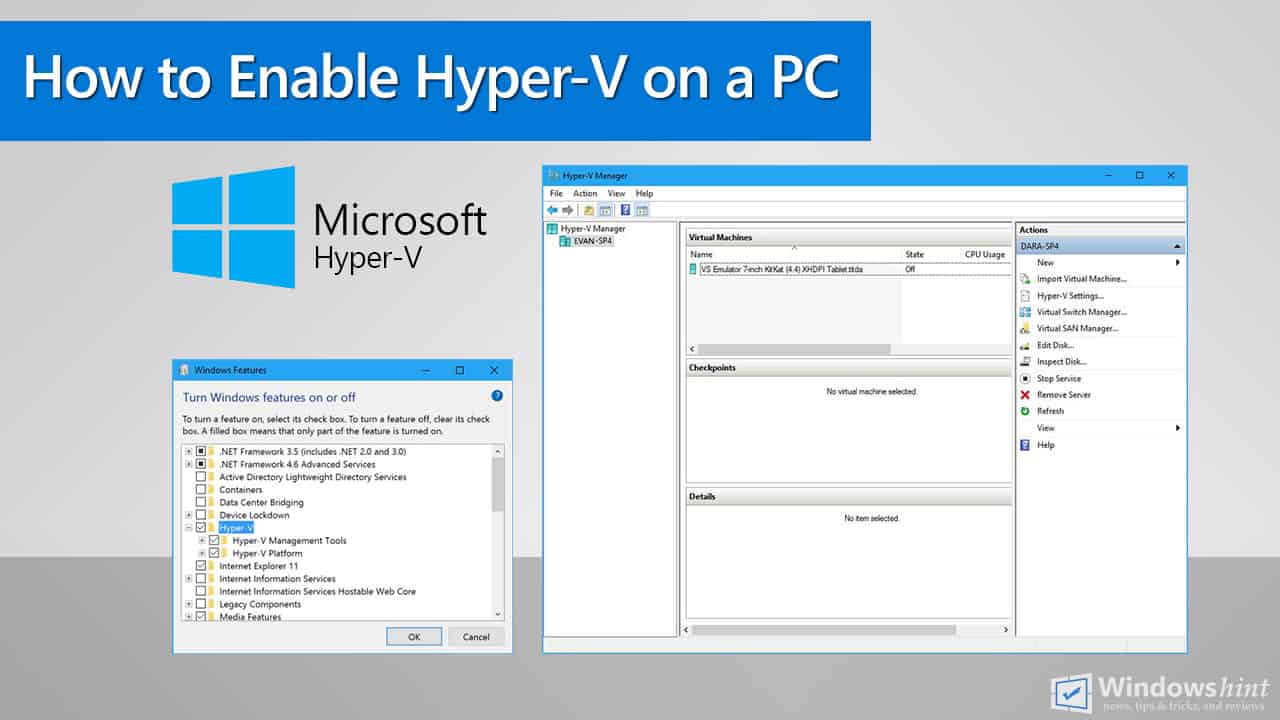
Hyper-V does available on the 64-bit version of Windows 10 Pro and Enterprise. However, you might can’t find that on your Program list by default. It is available as a Windows feature that you need to activate first before using it.
To activate the Hyper-V feature on your Windows 10 PC:
- On your keyboard press Win+X, and you will see a menu pop up from the start menu.
- Select Programs and features
- Click on the Turn Windows features on or off on the left of the window.
- Check on both sub-features of the Hyper-V feature available on the list.
- Click OK, and wait a few minutes until it finishes the installation.
- Finally, you need to restart your PC to fully finish the installation process.

After you restarted your PC, you will see Hyper-V Manager under Windows Administrative Tool on the start menu.
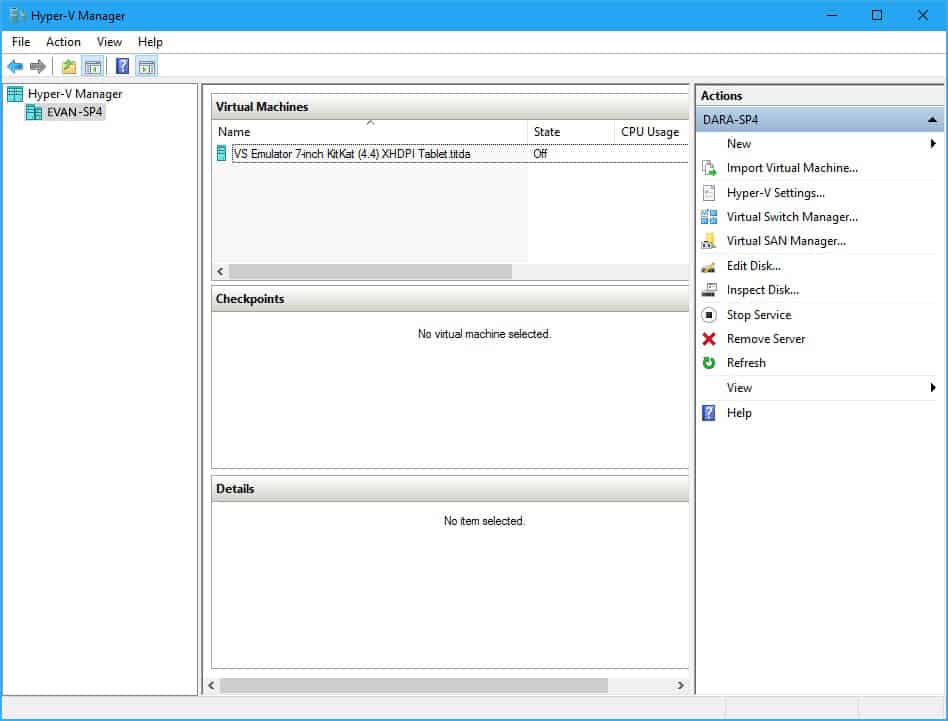
If you can find your Computer Name listed down under the Hyper-V Manager tree, it means that the Hyper-V is fully enabled and working fine on your Windows 10 PC.
Discover More
-

How to Add Text Glow Effect in Microsoft Word
-
How to Disable Transparency Effects on Windows 10?
-
How to Enable Windows 11 Virtual Touchpad
-
How to Install Official Adobe Acrobat Reader DC on Windows 11
-
How to Manage Startup Apps on Windows 10
-
How to Show or Hide Suggested Apps in Windows 10 Start Menu
-
How to enable "Hey Cortana" voice command on Windows 10
-
How to replace Microsoft Designer Bluetooth Mouse batteries


COMMENTS
Let us know what you think!
We appreciate hearing your thoughts, questions, and ideas about “How to Enable Hyper-V on Your Windows 10 PC”.